Team Explorer

How the Team Explorer works
The Team Explorer features an integrated source control using Git. It helps you keeping track of changes in your project, comparing and syncing them with Git providers like GitHub, Azure or others. This way you can not only make sure that your code is safe, but also helps you to work comfortably on your projects with a team. If you already have experience with Git in other IDEs like Visual Studio Code you should feel used to the Team Explorer immediately.
Get Started
Create new a new repository
- Create a new project or select the project you want to be in the new repository
- Open the Team Explorer
View -> Team Explorer - If your active project is not in a repository already it should look like this:

- Click on the button
Initialize Repository. - You now have created an empty repository. You can now see a list with files that got detected as changes. You can now commit these files to the repository by simply entering a message in the
Message for commit...box and clicking on the ✓ button. This will stage and commit all changes.

- Done! The repository got created at the same directory as your project. This is enough to track changes locally, but if you want to sync your changes with providers like GitHub you will need to add a remote
Clone an existing repository
- Get the URL of the repository you want to clone. It should look like this:
https://github.com/leonbeier/VHDPlus_Libraries_and_Examples - Open the Team Explorer
View -> Team Explorer - Open the Menu using the ⋯ button on the right of the Team Explorer view and select Clone
- A dialog will pop up asking you for the URL to the repository you want to clone. Paste the URL and confirm with
Enteror using theOKbutton. - A new dialog will pop up asking you to select the location for the cloned repository. Leave it as default or select a new directory using the folder icon on the right and confirm to start cloning.
- Once it finished cloning successfully a window will pop up showing the cloned repository. There you can select the project you want to open.
- Done! You now have your repository ready to use.
Add a remote
If you want to sync your changes with a host like GitHub, you need to add a remote.
- Get the URL of the repository you want to add as a remote. You can create a new one on the website (for GitHub here).
- Open the Menu using the ⋯ button and select
Remotes -> Add Remote - Paste the URL and confirm with
Enteror using theOKbutton. - Specify a name for the Remote. If this is the first remote you can just leave it at
origin. - Done! You should be able to sync your commits with the remote server now.
Work with the repository
Compare Changes
You can see all files that got added, modified or deleted in your Team Explorer. The symbol on the right of each entry represents the change that happened.
+Is a file that got addedMIs a file that got modifiedDIs a file that got deleted
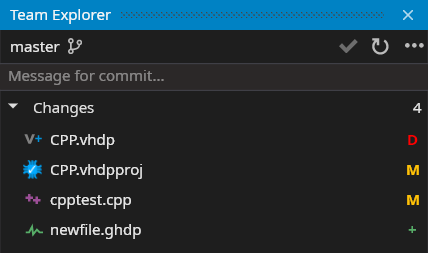
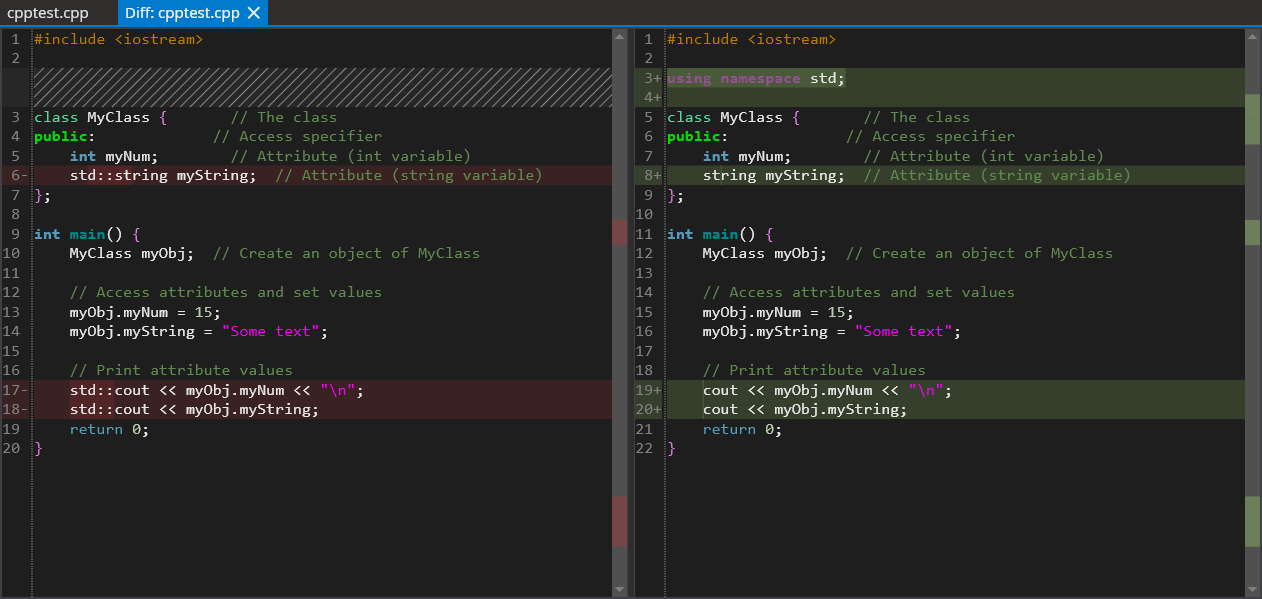
If the file is marked as modified you can open it to compare the changes line by line.
Sync Changes
If your repository is set up correctly you will find your git status in right bottom corner.
![]()
The first number shows how many commits are on the remote branch that you can pull and the second number how many commits are on your machine that you didn't push yet. On the right you will find a button showing your current branch. If you want to sync changes just click on the left sync button. This will first pull changes (if there are any) and then try to push the merged result. It is possible that merge conflicts occur that will prevent you from pushing your changes. This happens if you and someone else edited the same file so git doesn't know which one it should keep. In that case you have to fix the merge conflicts first before you can push your changes.
Fix merge conflicts
VHDPlus IDE has built in functionality to support you with merging your files. If you sync and merge conflicts occur you will see the affected files in your team explorer.

To fix the merge conflicts for each file you have a few options. You can view them by right clicking the file with merge conflicts.
- Accept all current changes: This option will always accept the changes from your machine for each conflict.
- Accept all incoming changes: This option will always accept the changes from the remote for each conflict.
- Decide individually for each merge conflict: Open the file and decide what changes should be accepted individually.
Every merge conflict will look like this:

You can use the buttons in the top line of every conflict to help you solving them or just change the file manually the way to want it to be. If you are happy with the result just right-click the file in the Team Explorer and select Accept Changes to stage the conflicted file.
If you resolved all merge conflicts you can commit and sync the result.