Hello World
VHDPlus IDE is still under development. The position of buttons and functions might not always be accurate.
For this "Hello World" example we are going to make the LED of our supported FPGAs blink. Of course, you can use a different FPGA for this as well, just make sure to connect the LED accordingly to your FPGA.
Requirements
| Version | Information | |
|---|---|---|
| FPGA | - | MAX10, MAX1000 or CYC1000 |
| VHDPlus IDE | 0.9+ | Instructions |
| Quartus | 18.1+ | Instructions |
| Device Support | - | Instructions |
| Device Drivers | - | Instructions |
Video Tutorial
Written tutorial
Create a new project
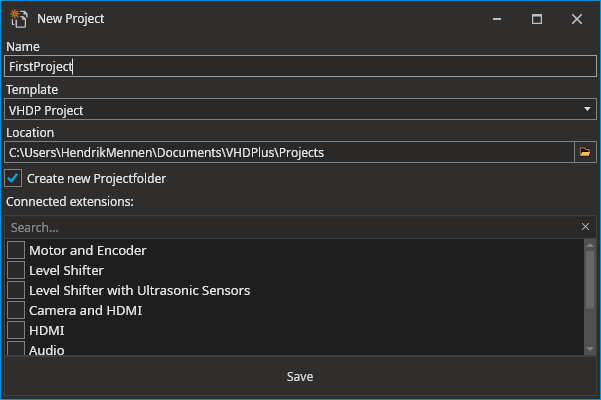
Start VHDPlus IDE and create a new project.
Select a name and decide if you want your "Hello World" template to be generated in VHDP or VHDL.

Click on Save and the generated "Hello World" file will open according to the language you chose.
- VHDP
- VHDL
Main
(
    led : OUT STD_LOGIC := '0';
)
{
    Process()
    {
        Thread
        {
            led <= '0';
            Wait(250ms);
            led <= '1';
            Wait(250ms);
        }
    }
}
library IEEE;
use IEEE.std_logic_1164.all;
use IEEE.numeric_std.all;

entity FirstProjectVHDL is
    port(
        CLK : in     std_logic;
        LED : buffer std_logic := '0'
    );
end entity FirstProjectVHDL;

architecture rtl of FirstProjectVHDL is
    signal counter : integer range 0 to 1000000 := 0;
begin

    blink: process(clk)
    begin
        if rising_edge(clk) then
            if counter < 1000000 then
                counter <= counter + 1;
            else
                counter <= 0;
                LED     <= NOT LED;
            end if;
        end if;
    end process blink;

end architecture rtl;
Connect Signals
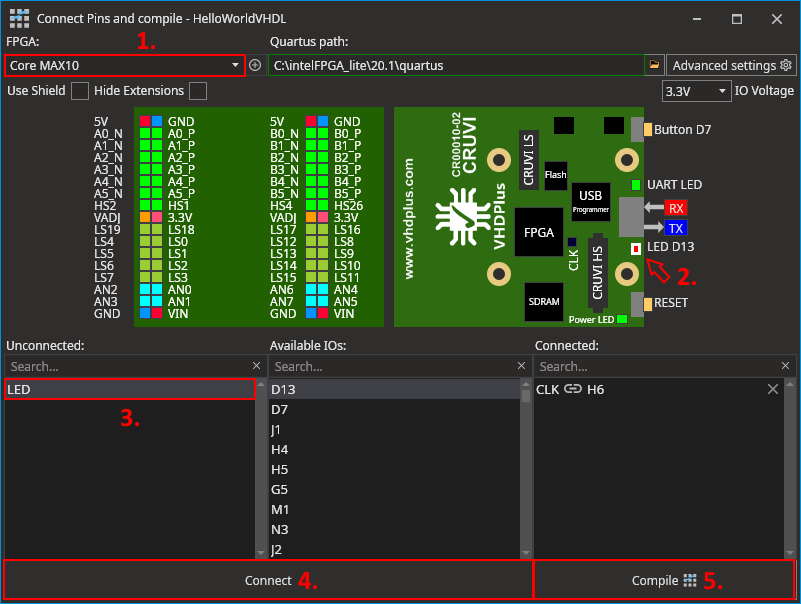
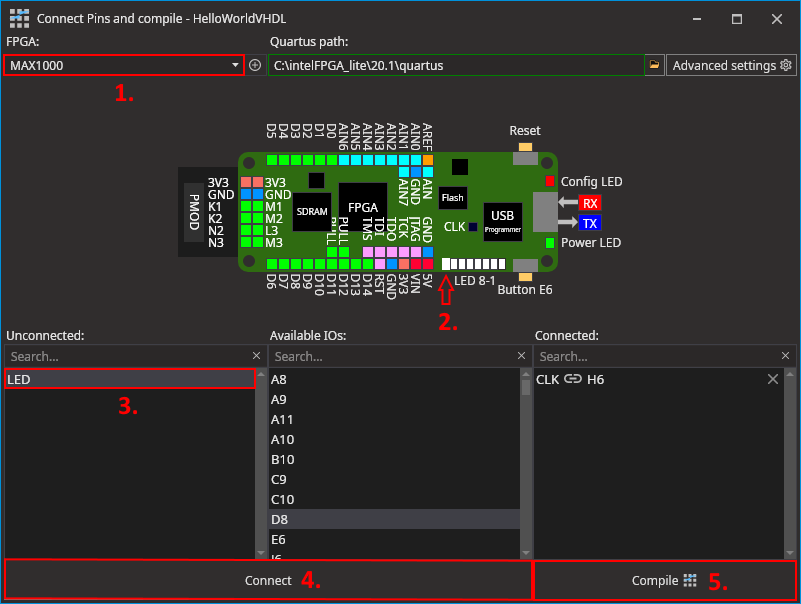
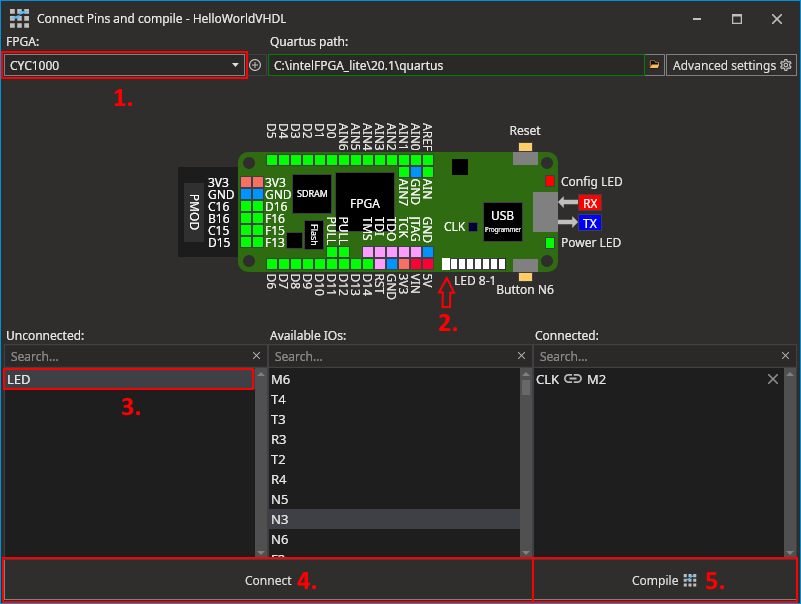
You can now connect your Signals and try out the program. Just click on the connect and compile button
A window will open where you can select the development board you are using. Next you need to connect the LED signal to your physical LED on your hardware.
This can be done easily by clicking on the LED as shown in the drawing for your development board below.
- MAX10
- MAX1000
- CYC1000


If you connected your LED Signal accordingly, Click on Compile.
Compiling can last up to several minutes, because the compiler attempts to find the most efficient way to connect the logic elements.
Download the compiled program to your FPGA
Connect your FPGA with an USB cable to your Computer.
Select your connected FPGA
If you have multiple FPGAs connected to your System, you can select the FPGA you want to use in the down right corner.
Download
Simply click on the program button.
By default, short-term programming is enabled. This works faster, but the program will be lost on a power cycle.
If you want to keep your program even after a power cycle, select Extras->Long-Term Programming.
Done ✔ Need help?
If everything worked as planned, the LED of your FPGA should blink every second.
If anything went wrong, feel free to ask for help.
For the fastest response, join us on Discord.