Light Tracker with Camera
What is the tutorial about?
In this tutorial you learn how to use a camera and servos. The white parts of the camera image are detected and with two servos the camera is turned into the direction of the light.
What you need
Important: This are only links for the German products.
*This links are Affiliate Links. By purchasing with them you support us and our work, because we get a part of the revenue as commission. You still pay the same price.
If you want to do more image processing, you can check out ONE WARE Studio!
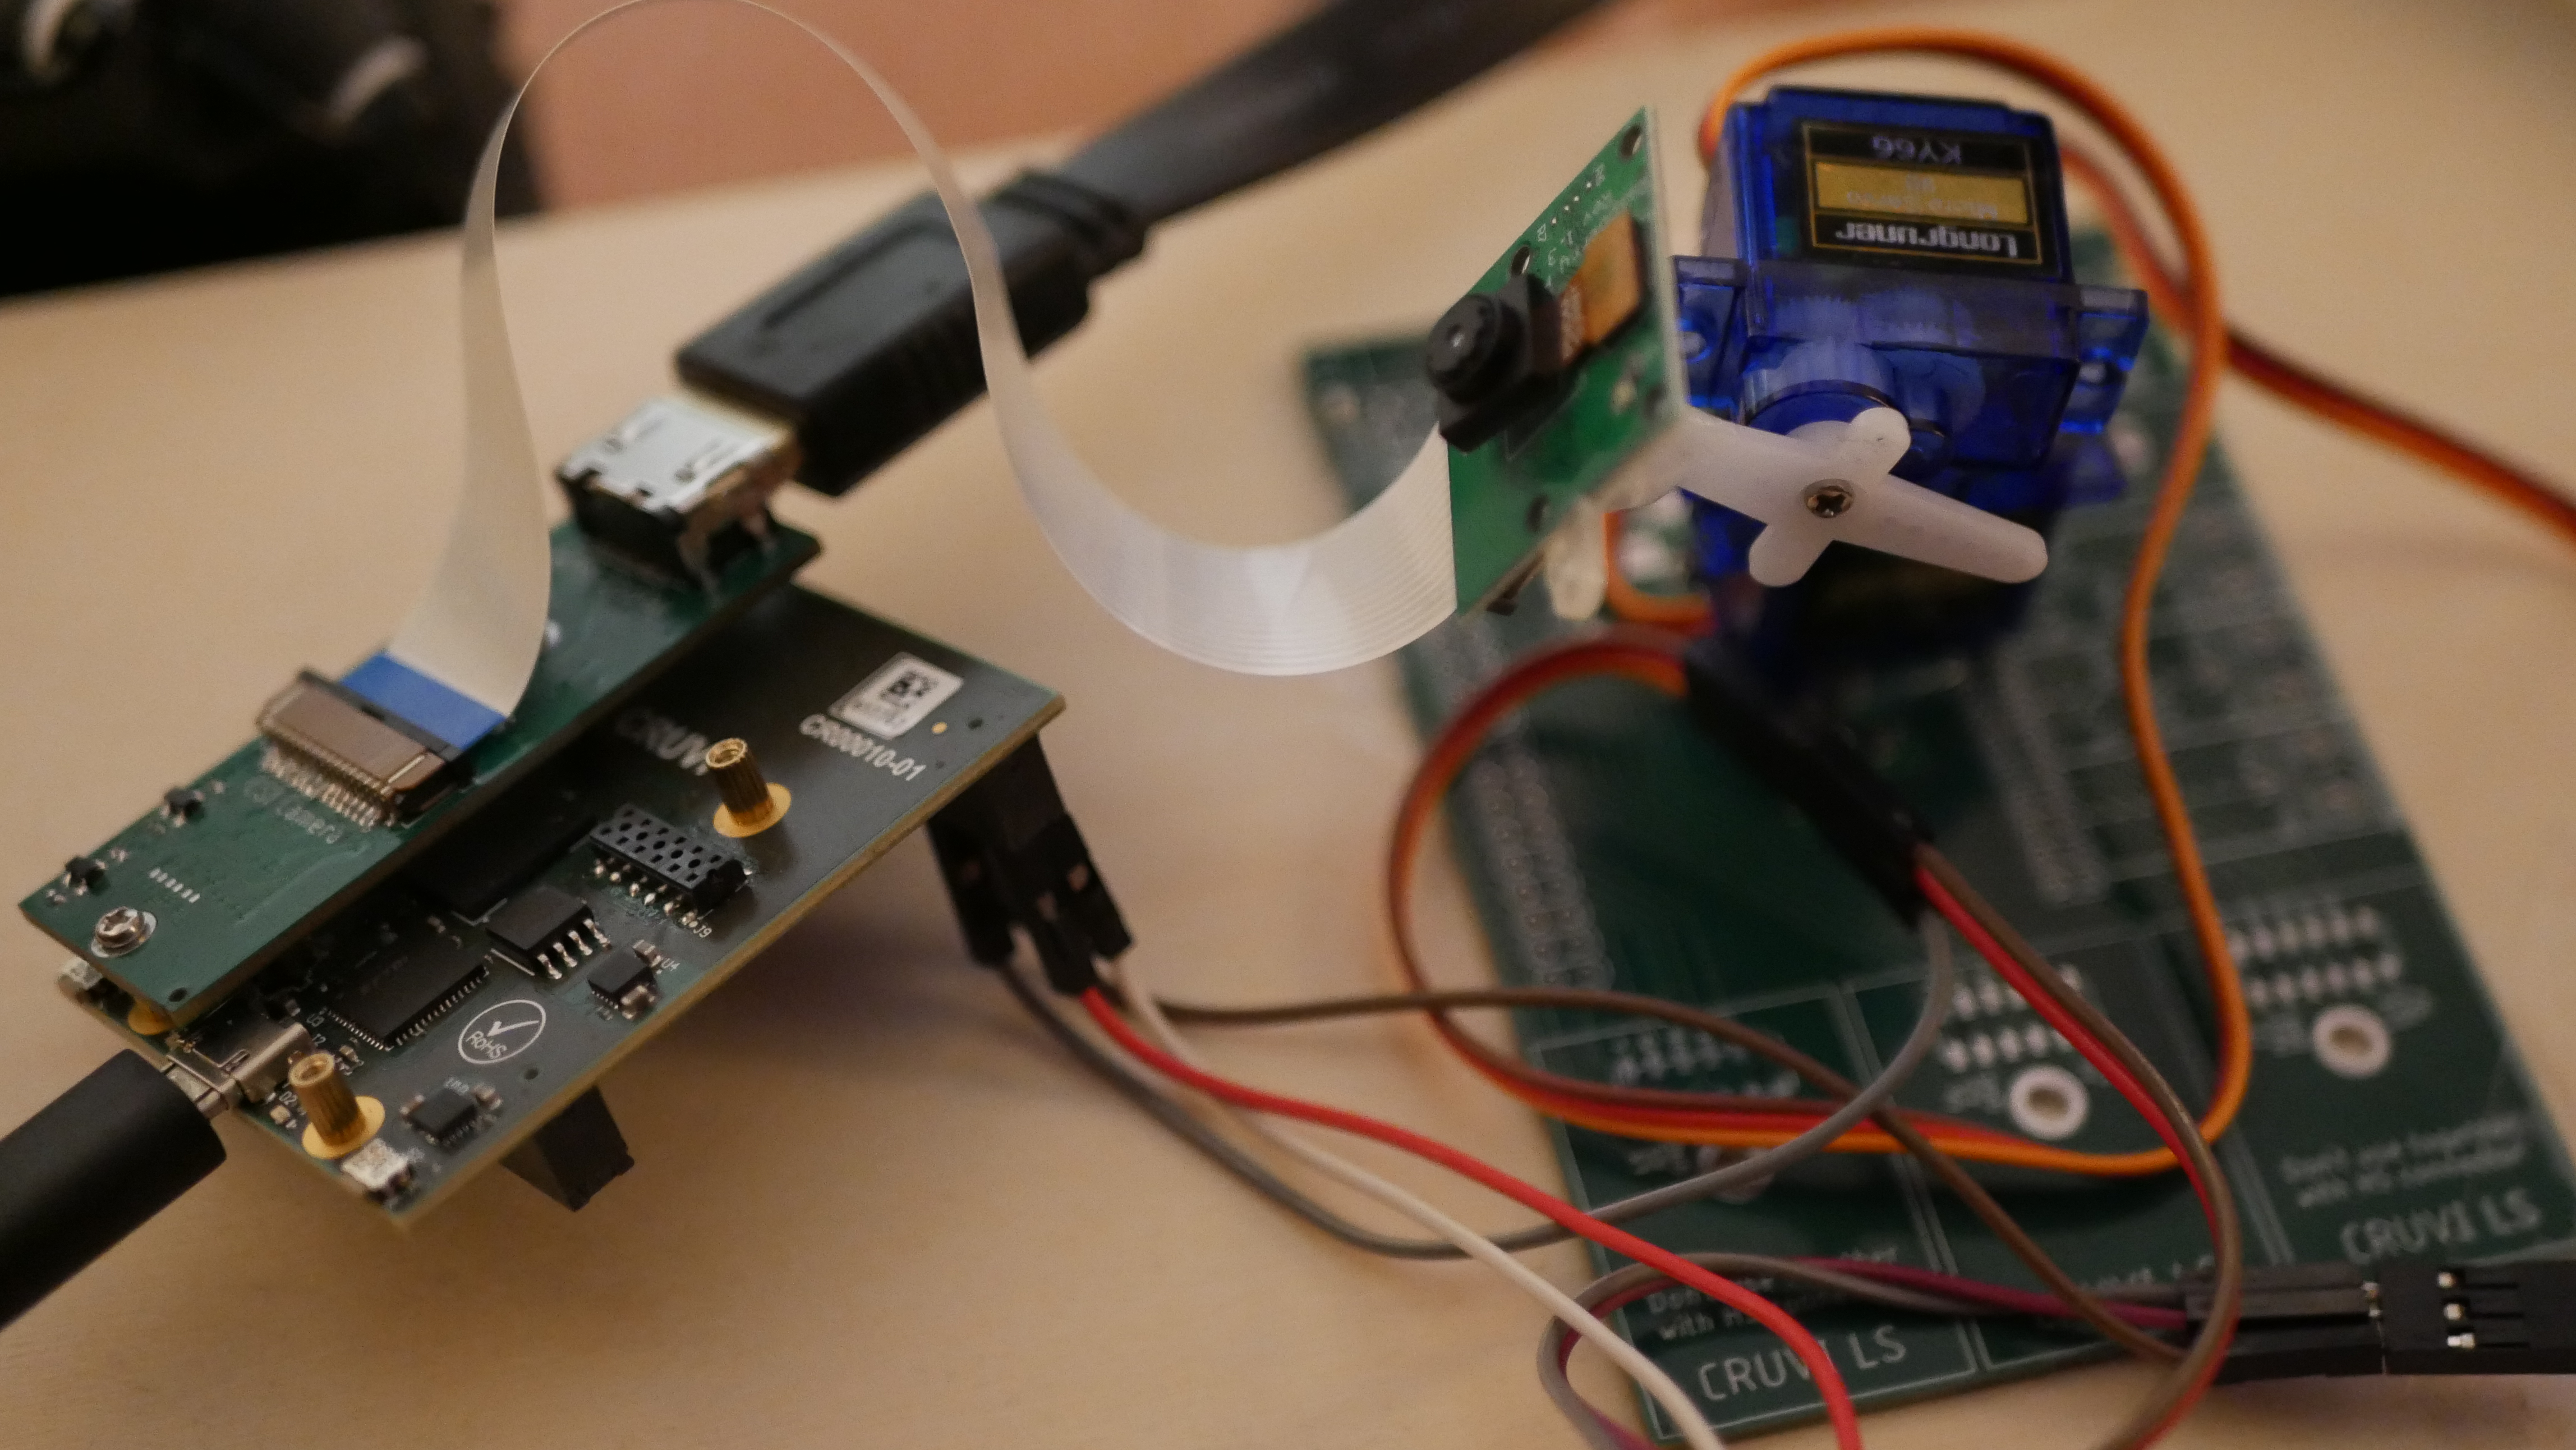
Hardware
I used hot glue, the 2 servos and an unused PCB as base plate.
Really nothing special.
The Electronics
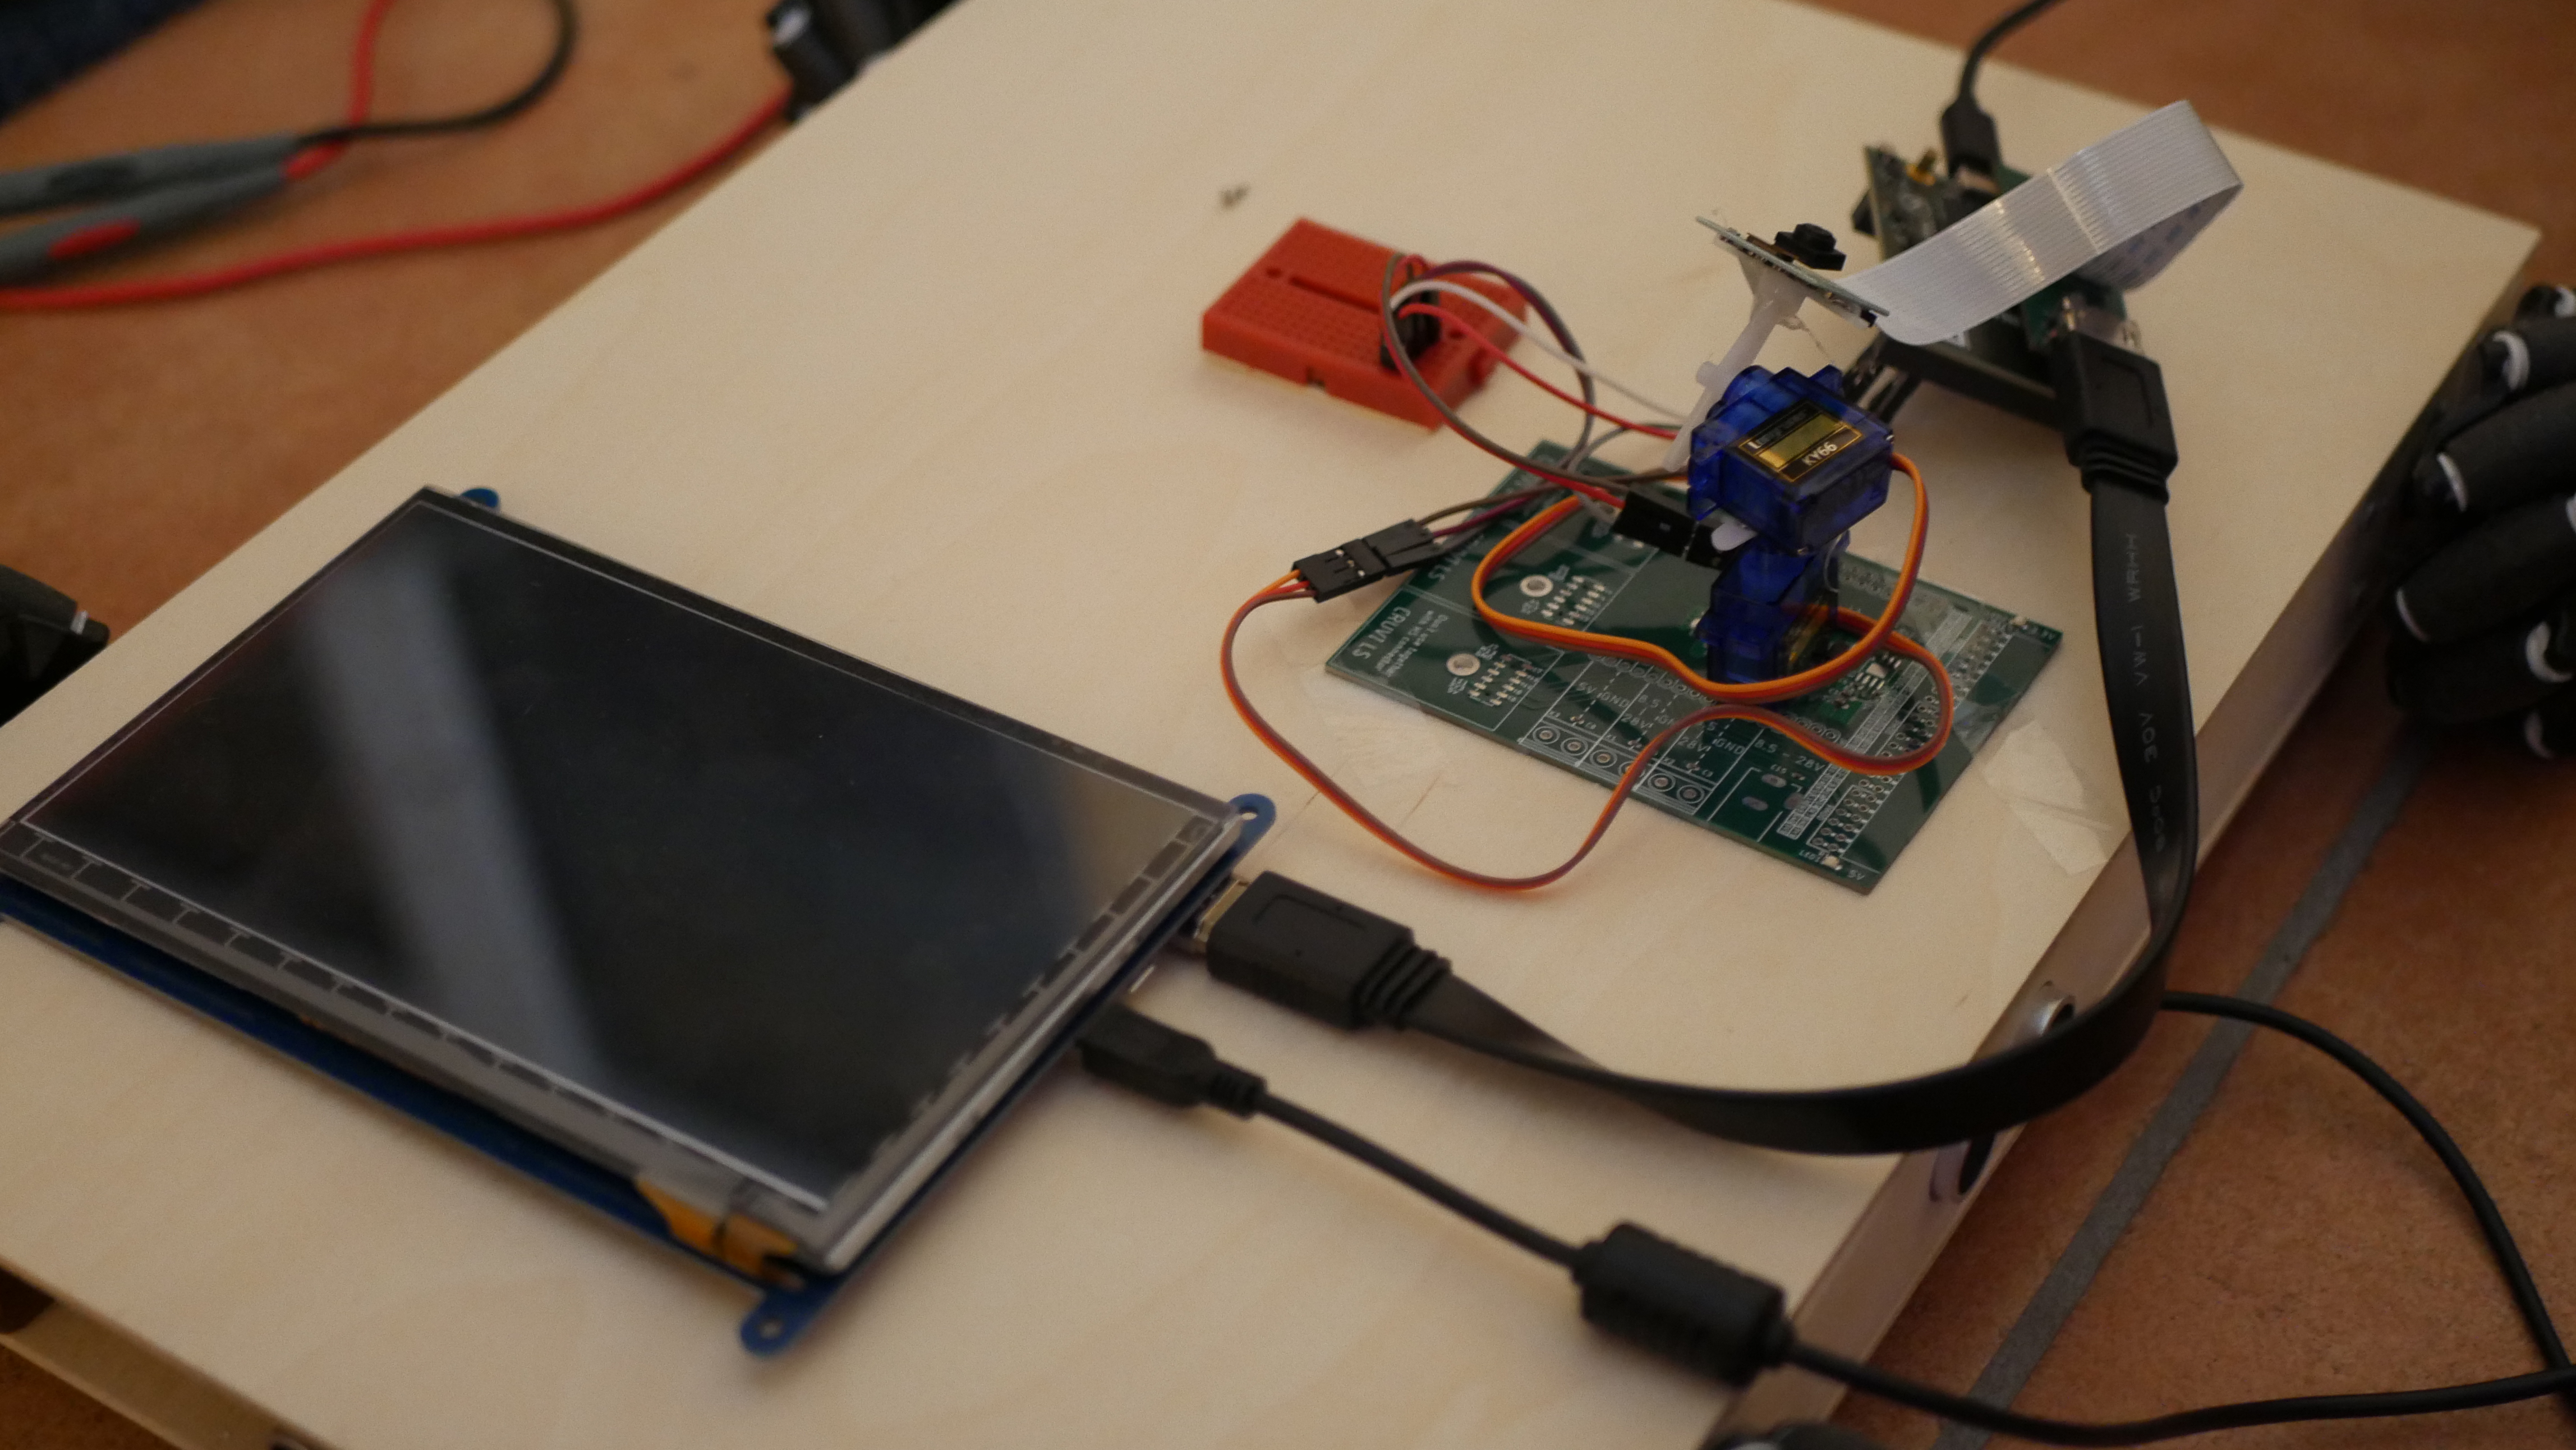
Just add the Camera Extension on the top and connect the servos. The red and black cable has to be connected with 5V and GND and the yellow cable with a standard IO.
Program the Tracker
You can find the code here.
Here are some important lines:
With 50Hz the Servo is turned in the direction of the light. After detection, Center_Direction_Move_Up/Down/Left/Right is set true if the light is not in the center.
Process ()
{
    Thread
    {
        If(Center_Direction_Move_Up AND Servo_Controller_Pos_Y < 127)
        {
            Servo_Controller_Pos_Y <= Servo_Controller_Pos_Y + 1;
        }
        Elsif(Center_Direction_Move_Down AND Servo_Controller_Pos_Y > 0)
        {
            Servo_Controller_Pos_Y <= Servo_Controller_Pos_Y - 1;
        }

        If(Center_Direction_Move_Left AND Servo_Controller_Pos_X > 0)
        {
            Servo_Controller_Pos_X <= Servo_Controller_Pos_X - 1;
        }
        Elsif(Center_Direction_Move_Right AND Servo_Controller_Pos_X < 127)
        {
            Servo_Controller_Pos_X <= Servo_Controller_Pos_X + 1;
        }

        Wait(20ms); --50Hz like framerate
    }
}
With the Min and Max values you can set the color to detect.
NewComponent Color_Threshold_HSV_Filter
(
    CLK_Edge => false,

    H_Min    => 0,        --Min Hue (0°-180°)
    H_Max    => 255,      --Max Hue (0°-180°)
    S_Min    => 0,        --Min Saturation (0-255)
    S_Max    => 5,        --Max Saturation (0-255)
    V_Min    => 240,      --Min Brightness (0-255)
    V_Max    => 255,      --Max Brightness (0-255)

    iStream  => HSV_Stream,
    oStream  => Red_Threshold_Stream,
);
Here you can set the HDMI output settings (not important for the tracking)
--HDMI Output
    CONSTANT Force_Mono          : BOOLEAN := true;  --true forces the image to monochrome
    CONSTANT Capture_Color_Depth : NATURAL := 1;      --How many bits for each color
    CONSTANT Capture_Compression : NATURAL := 2;      --Higher value = less RAM but also less resolution
    CONSTANT Full_Image          : BOOLEAN := true;   --true -> full image with less resolution | false -> part of image with full resolution
And here you can select what should be shown with the display.
Camera_Capture_iStream <= Red_Threshold_Stream;
--Camera_Capture_iStream <= Camera_Stream;
We hope you enjoyed the tutorial and feel free to check out